
Please try the following solutions:
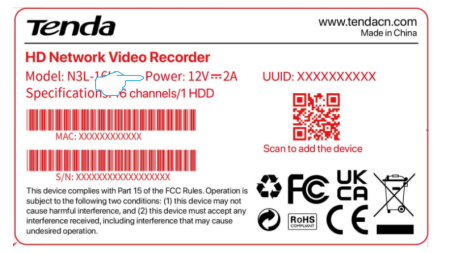
1. Use the included power adapter to power on the NVR. If you use a self-prepared power adapter, please ensure that the power specification meets the requirement. You can see the power specification on the bottom label of the device.
2. Ensure that the power adapter is connected to the NVR properly.
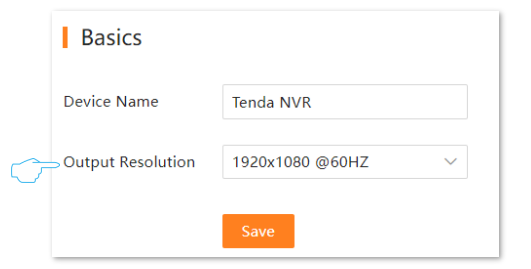
3. Replace the VGA/HDMI cable that connects the monitor and the NVR. If the problem persists, please enter the web UI of the NVR, then navigate to System Management > System Settings > Basics to reduce the output resolution of the NVR.
4. If the reboot page always displays on the monitor or the problem persists, please contact Tenda technical support.
what should I do if the GUI preview is normal, but the recordings cannot be checked during playback?
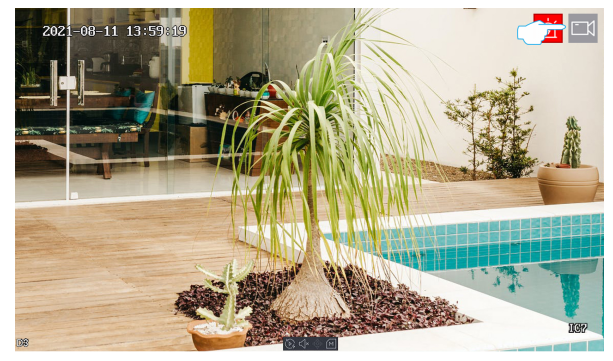
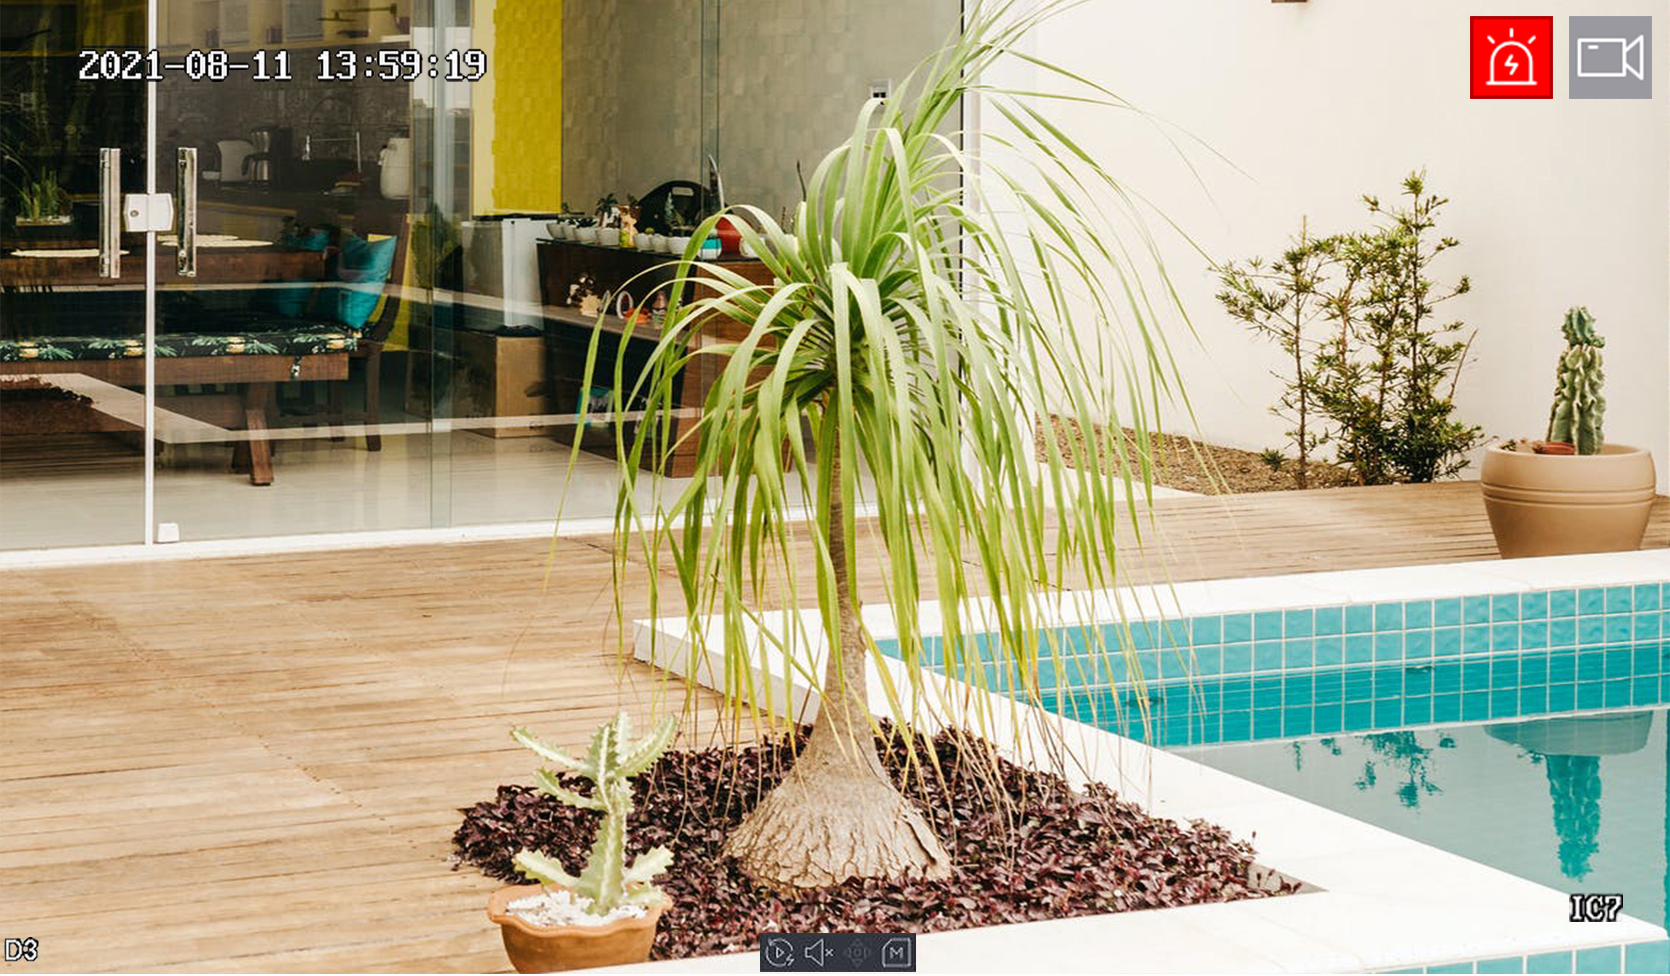
Enter the Live View page to view whether a recording icon  is displayed in the upper right corner of the channel.
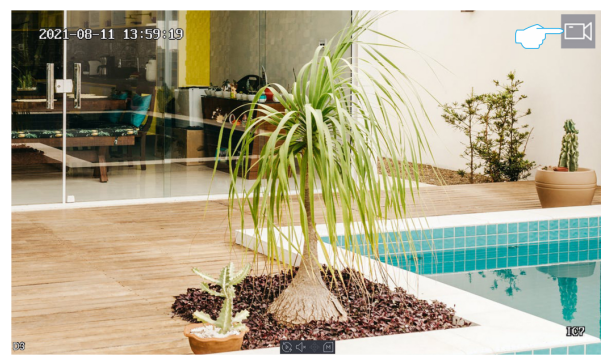
If no recording icon is displayed in the upper right corner of the channel, try the following solutions:
• If the HDD is not installed inside the NVR, please install it first.
• Navigate to Configuration > Storage > HDD to check whether the HDD is normal. If the status of the HDD is abnormal, please shut down the NVR first, then remove the cover and unplug and re-plug the HDD. If the problem persists, please format or replace the HDD.

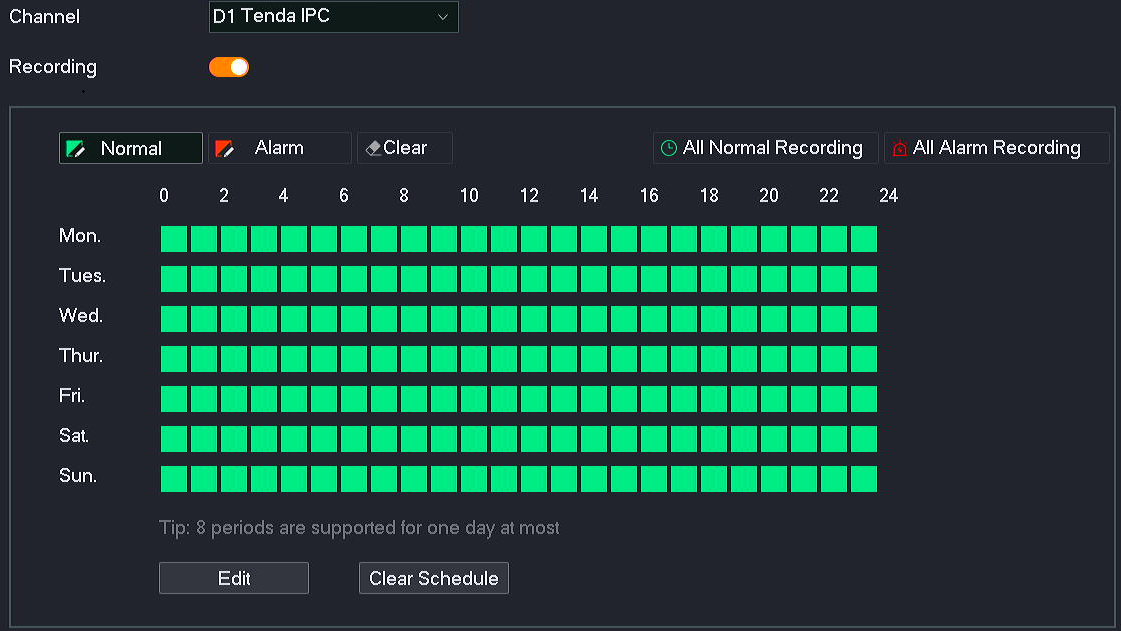
• Navigate to Configuration > Storage > Schedule to check that the recording function is enabled, and the recording mode and time are set correctly.
If a recording icon is displayed in the upper right corner of the channel, please try the following solutions:
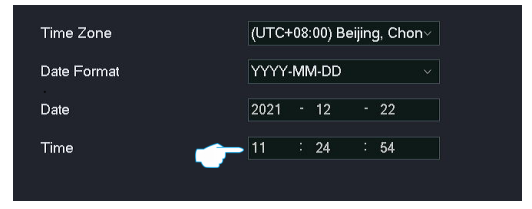
• Navigate to Configuration > System > Time to ensure that the system time of the NVR is accurate.
• Navigate to Configuration > Storage > HDD to check whether the HDD space is full. By default, the Overwrite function is enabled. If the HDD space is full, the oldest recording files will be overwritten.

• Navigate to Configuration > Storage > Schedule to confirm whether the recording schedule of the channel is alarm recording in this period. Under the alarm recording mode, the NVR will record when a moving target is detected and an alarm is triggered. At this time, it is normal for the recording to be discontinuous.
• Please view the logs of this period to check whether the NVR has such abnormal conditions as frequent startup/shutdown, power failure, manual shutdown of recording schedule and channel error before and after the recording interruption time. To view the logs, navigate to Maintenance > Device Log (System Management > Device Info > Device Log for web UI).
What should I do if the recording storage time does not meet expectations?• Navigate to Configuration > Storage > HDD to check whether the HDD space is full. If yes, please replace the HDD with one of larger capacity.

• Ensure that the lens of the camera is clean, the installation is not backlighted and the related parameters (such as aperture, resolution, bitrate and frame rate) are configured properly. An unreasonable installation environment and parameter settings will increase the bitrate and enlarge the image data. You can log in to the web UI of the camera to modify the related parameters.
•
what should I do if there is no alarm recording after the motion detection is set?1. Ensure that the motion detection alarm function is set properly.
Enter the Live View page to view whether an alarm icon  is displayed in the upper right corner of the channel when the camera detects a moving target.
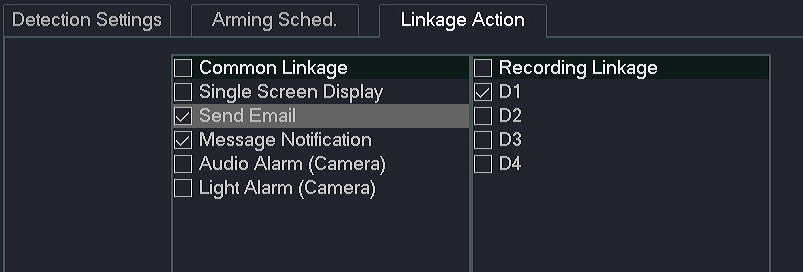
If no alarm icon is displayed in the upper right corner of the channel, navigate to Configuration > Alarm > Motion Detection and try the following solutions:
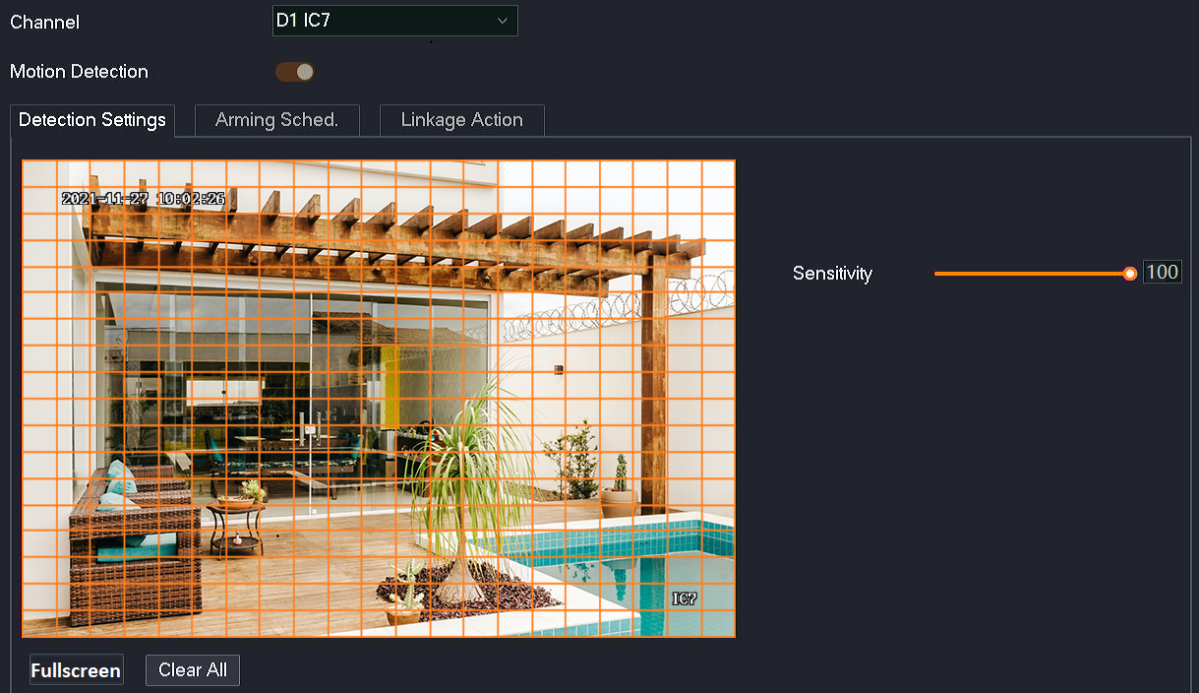
• Ensure that the motion detection function of the channel is enabled.
• Ensure that the motion detection area and sensitivity are set correctly under the Detection Settings module of the channel.
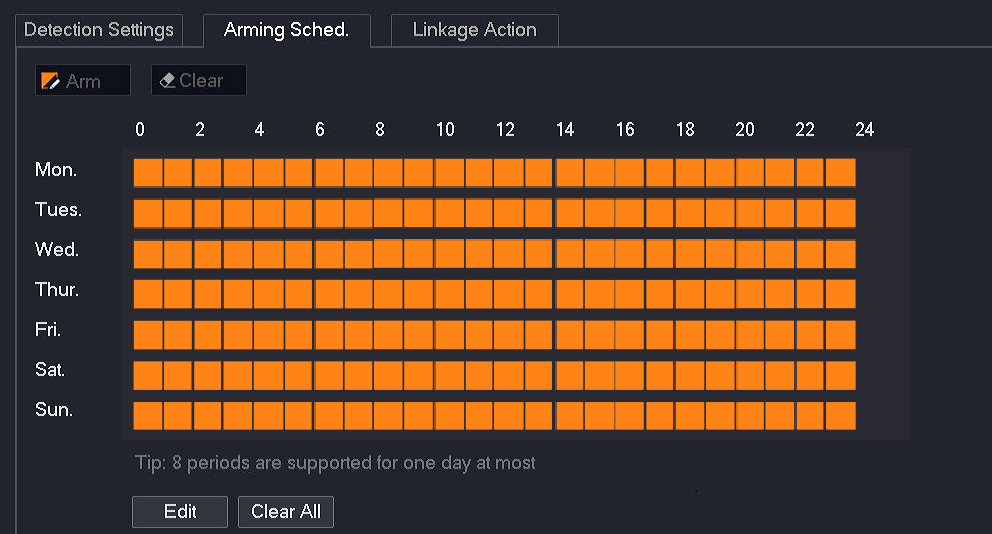
• Ensure that the arming schedule of the channel is set correctly.
• Ensure that the corresponding channel has been triggered under the Linkage Action of the channel.
2. Ensure that the NVR records properly when the camera detects an alarm event.
Enter the Live View page to view whether a recording icon  is displayed in the upper right corner of the channel when the camera detects a moving target. If not, please refer to What if the GUI preview is normal, but the recordings cannot be checked during playback?
Try the following solutions:
• Navigate to Configuration > Network > Internet to manually modify the IP address of the NVR or enable the DHCP function.
• Modify the IP address of the conflicting device.
Why does the IP address of the camera change when the camera is connecting to the NVR?When the camera is connecting to the NVR, it is normal for the IP address of the camera to change. If you want to fix the IP address of the camera, you can log in to the web UI of the camera and set a static IP address.
There are some possible reasons for the camera IP address change:
• If the camera has been connected to a switch or router that is connected to the LAN port of the NVR and the DHCP function is enabled, the camera will automatically obtain the IP address from the DHCP server (router or L3 switch) of the network.
• After the Auto add LAN cameras function of the NVR is enabled, if multiple cameras connected to the LAN port of the NVR have the same IP address, the conflict IP address will be modified on the NVR to ensure normal network communication.
• If the camera has been connected to the PoE port of the NVR and the DHCP function is enabled, the camera will automatically obtain the IP address from the DHCP server of the NVR.
If the WiFi NVR cannot find the WiFi camera, please try the following solutions:
• If it is a camera in the video security kit, the camera can be discovered and added automatically within 120 seconds after the NVR is started. After the NVR is working properly, if there is a new camera online, the camera can be discovered automatically and a prompt will be displayed through a pop-up window.
• Ensure that the WiFi camera is reset.
• Ensure that the camera is within the coverage range of the NVR. If the LED indicator of the camera keeps blinking blue, please move the camera closer to the NVR, power on the camera, and wait until the LED indicator of the camera turns solid blue.
• Ensure that the position of the camera is within the range of the NVR. You are recommended to place the camera near the NVR and power it on, wait until the LED indicator of the camera turns solid blue, and then install the camera to the desired position (the LED indicator of the camera is still solid blue).
• If the problem persists, please contact Tenda technical support.
If the camera has been connected to the PoE port of the NVR, please try the following solutions:
• Log in to the web UI of the camera and enable the DHCP function.
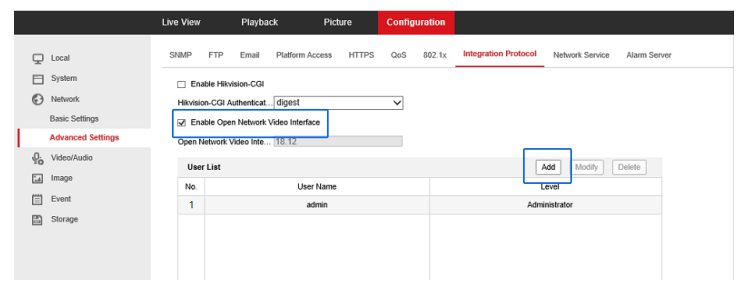
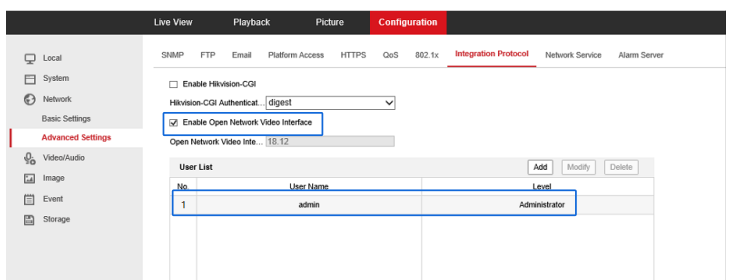
• For third-party cameras, ensure that the ONVIF function is supported and enabled and an administrator with the user name admin is added to the user list. (The following figure is for reference only.)
a) Enter the settings page of ONVIF protocol, tick Enable Open Network Video Interface, and then click Add .
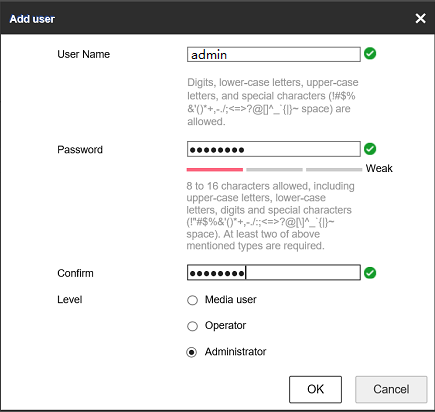
b) Set the user name to admin, set and confirm the password the user name, and then sEt Level to Administrator, and click OK .
• If the problem persists, please contact Tenda technical support.
If the camera has been connected to the LAN port of the NVR, try the following solutions:
• Ensure that the NVR is working properly, and connect the camera to the switch or router that is connected to the NVR correctly and securely.
• Ensure that the IP address of the camera and LAN IP address of the NVR are in the same network segment.
Method 1: Use the client management tool (such as OVNIF Device Manager) to modify the IP address of the camera.
Method 2: Log in to the web UI of the camera to modify the IP address of the camera.
Method 3: Log in to the web UI of the camera to enable the DHCP function.
• For third-party cameras, ensure that the ONVIF function is supported and enabled and an administrator with the user name admin is added to the user list. (The following figure is for reference only.)
• Replace the Ethernet cable that connects to the camera.
• If the problem persists, please contact Tenda technical support.
what should I do if the preview image of the NVR is not smooth?• Log in to the web UI of the camera and preview the monitoring image. If the image is not smooth, please contact the technical support of the camera manufacturer.
• Manage the NVR on GUI. Navigate to Maintenance > Diagnosis to check the network connectivity.
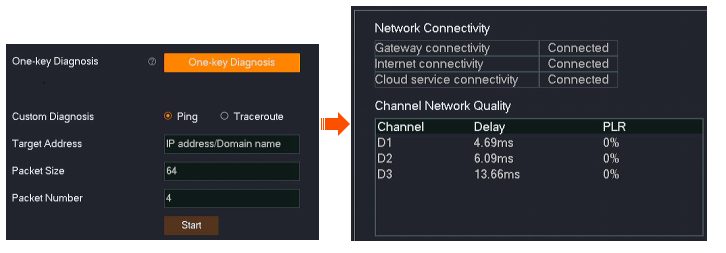
Method 1: One-key Diagnosis
Click One-key Diagnosis , then wait for the diagnosis result. If the channel has a high delay or packet loss, please use a better network environment.
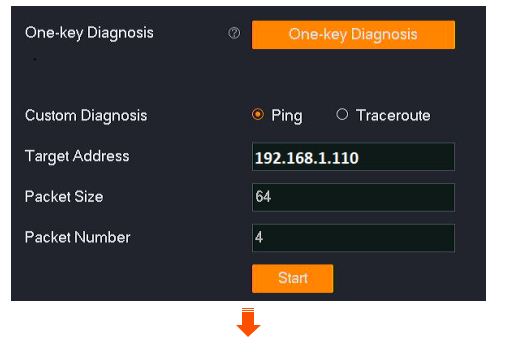
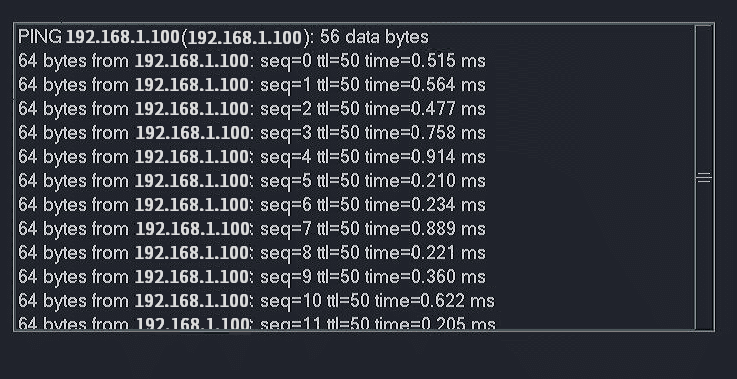
Method 2: Detect the connectivity between the NVR and the single camera.
Enter the IP address of the camera in Target Address, and set other parameters (the following figure is for reference only). Then, click Start and wait for the diagnosis result. If the channel has a high delay or packet loss, please use a better network environment.

• Increase the frame rate of the camera on the Audio & Video page of the NVR or camera.
• Check whether the bandwidth of the switch meets the requirements.
Reduce the number of cameras connected to the switch. If the phenomenon of unsmooth monitoring image is improved or disappears, you are recommended to replace the switch with one of higher performance.
Recommended: Choose a 100 Mbps switch for no more than 16 megapixel cameras, choose a Gigabit switch for more than 16 megapixel cameras.
• Reboot the NVR.
• If the problem persists, please contact Tenda technical support.
what should I do if the playback of the NVR is not smooth?1. Check whether the image is smooth when previewing the monitoring image. If it is not smooth, please refer to What should I do if the preview image of the NVR is not smooth?
2. If the monitoring image of the NVR is smooth during preview, you can export the recording file and play it on your computer or smartphone through the audio and video player.
• If the player plays the recording file properly, the read and write performance of the HDD may be poor. Please replace the HDD.
• If the player does not play the recorded file smoothly, you can contact Tenda technical support or log in to the Tenda website to get the latest upgrade file of the NVR, then upgrade the firmware of the NVR.
what should I do if there is a delay in the preview image of the NVR?• Log in to the web UI of the camera and preview the monitoring image. If the image is not smooth, please contact the technical support of the camera manufacturer.
• Manage the NVR on GUI. Navigate to Maintenance > Diagnosis to check the network connectivity.
Method 1: One-key Diagnosis
Click One-key Diagnosis, then wait for the diagnosis result. If the channel has a high delay or packet loss, please use a better network environment.
Method 2: Detect the connectivity between the NVR and the single camera.
Enter the IP address of the camera in Target Address, set other parameters (The following figure is for reference only.), then click Start , and wait for the diagnosis result. If the channel has a high delay or packet loss, please use a better network environment.
• Reboot the NVR.
• If the problem persists, please contact Tenda technical support.

