II. Login to the management page of the router
1. Open a web browser (IE, Firefox, Safari, etc.) and find the address bar, leaving it blank before typing in 192.168.1.1, then press enter.

(Care: The address bar is in the most top of the web page after opening web browser).
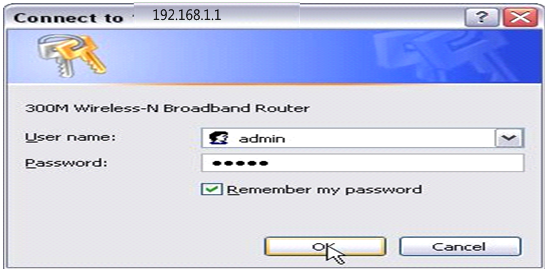
2. Input the default user name and password: admin in the following pop-up window, then click on OK.
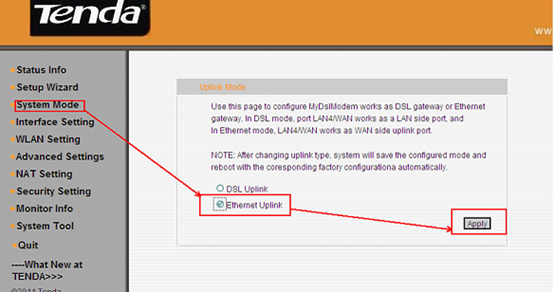
3. Click on system mode then choose Ethernet Uplink and click on apply, it will reboot.
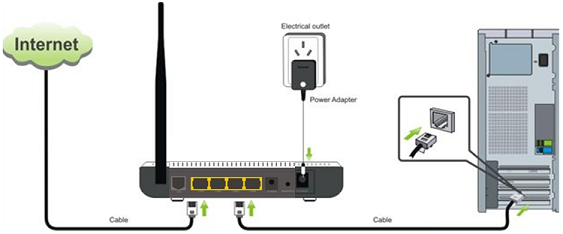
(Then connect your internet cable to the 4th port of the router. Make sure the LED light 4/WAN is on or blinking now)
4. Then click on Setup Wizard on the left menu, and then choose your internet access mode. If you don’t know, please ask your ISP. When you have selected the right mode, just click on next.
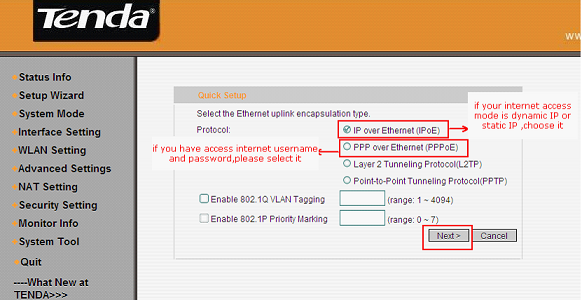
IPoE(IP Over Ethernet) click here.
PPPoE(PPP Over Ethernet) click here.
L2TP(Layer 2 Tunneling Protocol) click here.
PPTP(Point-to-Point Tunneling Protocol) click here.
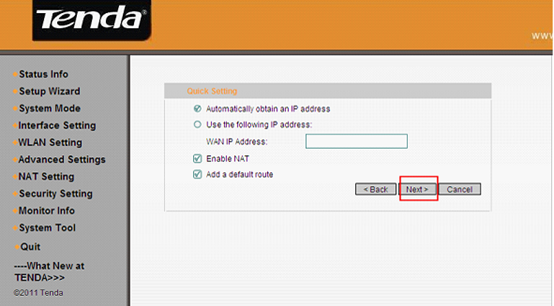
4.1 If you choose IPoE, you will see the following page. Select the correct access mode and click on next and then click on apply at the next page. Then click here
.

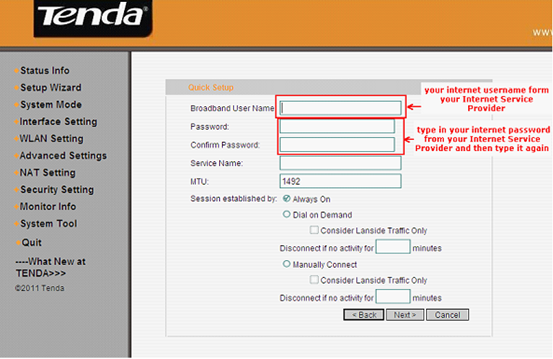
4.2 If you choose PPPOE, you will see the following page. Select the correct access mode and click on next and then click on apply at the next page.
Type in the username and password provided by your ISP in this following page, and then click on next and click on apply at the next page.Then click here.
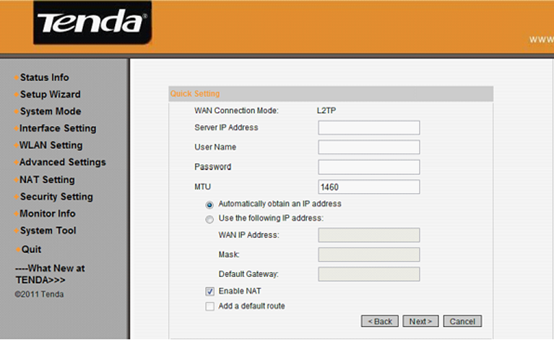
4.3 If you choose L2TP, type in the information in this following page. Select the correct access mode and click on next and then click on apply at the next page.Then click here.
4.4 If you choose PPTP, type in the information in this following page. Select the correct access mode and click on next and then click on apply at the next page.Then click here.

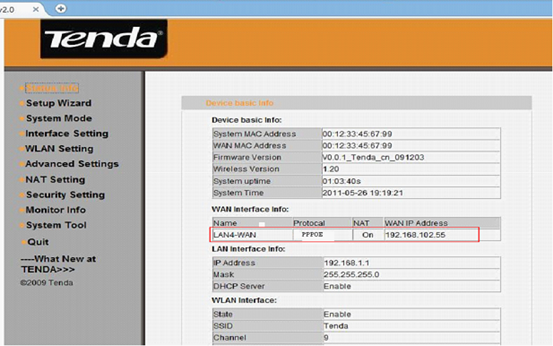
4.5 You will go to Device basic Info, please check WAN Interface Info. If WAN IP Address has been assigned, it means you can have internet now.If not, please go to III.
III. If the WAN IP Address shows Not Assigned, please try the following steps.
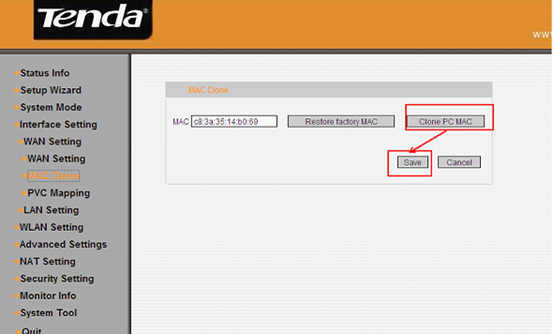
1. Click on Interface Settings on the left menu and then go to MAC Clone. Please click on Clone PC MAC and don’t forget to save.
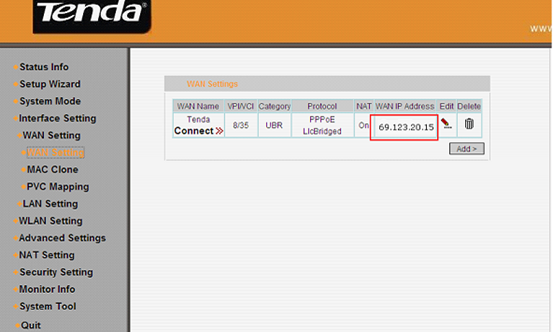
2. Refresh or reload this page to check the WAN Interface Info, or go to Interface Setting then WAN settings to find if the WAN IP Address has some numbers, if it has, please skip to IV, or else please go to the next step.
3. Click on LAN Setting under Interface Settings on the left menu, then change IP address 192.168.1.1 to 192.168.10.1 and click on Apply, the modem router will be reboot.
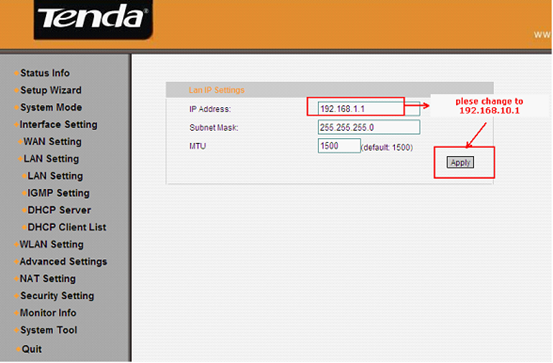
4. Type in 192.168.10.1 to the address bar and login to the home page again. Go back to Interface Setting-> WAN settings to see the WAN IP Address. If it still has no IP address, please power off your modem for a while, then turn the power back on and then redo step 4. If it has an IP address, you can access internet now.Please go to IV.
Please make sure your access mode, username and password are correct.
If the problem still exists, please
contact us
IV. Steps for wireless settings
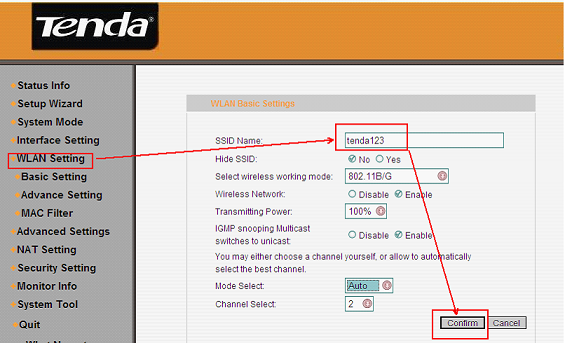
1. Click on WLAN setting then basic setting on the left menu, please change SSID (it’s the name of your wifi) to another name, only numbers or letters can be included in, and then click on confirm.
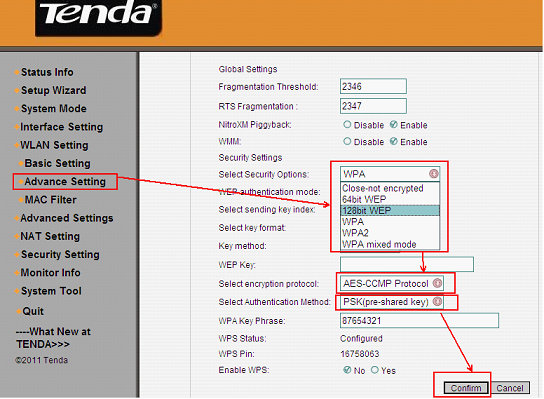
2. Click on WLAN setting then Advanced setting, please select Security Options to WPA, change Select encryption protocol to AES-CCMP Protocol, choose Select Authentication Method to be PSK ,and then set the security key for wifi at WPA Key Phrase(at least 8 numbers or letters).Next, please go to V.
V. Connect to wireless network
1. Unplug the cable between your computer and Tenda router.
2. Find the name of your wireless network, the SSID you set it before.
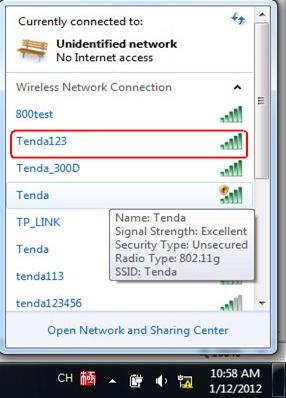
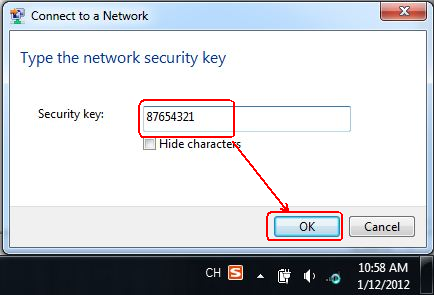
3. Type in the correct security key to connect. When it shows connected, you can use wifi now.

 W548D-How to setup it in Ethernet mode?