How to setup the ADSL Router in ethernet mode

截图00.pngHow to setup the ADSL Router in Ethernet mode?

Product line: ADSL              Question category: Internet Settings

 I. Physical connection:


1. Take an Ethernet cable to connect your computer with one of the yellow LAN ports (1,2 or 3) of the router, and then plug your Internet cable into the 4th port of the router.

 2. Check the LED lights and ensure that Power is on, the LAN port which you have plugged the cable in is on, the SYS and DSL are blinking, WLAN is on or blinking, 4/WAN is on or blinking.


II. Login to the management page of the router:

 1. Open a web browser (IE, Firefox, Safari, etc.) and find the address bar. Leave it blank before typing in 192.168.1.1, and then press enter.

(Note: The address bar is in the most top of the web page after opening web browser).

2. You will see this following page,  please hit on Advanced Settings.

3. You will see the following page.

4. Click Advanced Setup first, then click connection Mode, check Ethernet Mode and click Apply. It will reboot if you change the mode form DSL Mode to Ethernet Mode.

 5. Then go back to Advanced Setup and choose WAN Service. Click ETH Interface and click Add to add a new setting.

6. In the following page, please choose default mode and click Apply/Save to save the setting.

 7. Click Advanced setup > WAN Service > Connection Setting. Click Add to add a new connection.

8. Select the WAN service type and then click Next. If you are not sure, please ask your Internet Service Provider.


PPPoE(PPP Over Ethernet) click here

IPoE(IP Over Ethernet) click here.   

8.1 For PPPoE.Type in the username and password provided by your ISP in the following page, and then click on next to continue.

Click on next again in the follwing pages until click on apply to save the settings. Then you can click here to skip to 9.

8.2 For IPoE. You will see the following page.

  Obtain an IP address automatically, if your ISP doesn’t give you a fixed IP. If you have a fixed IP given by your ISP, please check Use the following IP address, typing in the IP address information in the blanks.

  Click on next to continue.Click on next again in the follwing pages until click on Apply/Save to save the settings. Then you can click here to skip to 9.  

9. Please go to WAN under Device Info on the left menu,check WAN status and IPV4 Address. If it shows connected and have assigned an address,it means you have internet now, please skip to IV. If not, please go to III.


III. If the WAN Status doesn’t show connected, please try these following steps. 

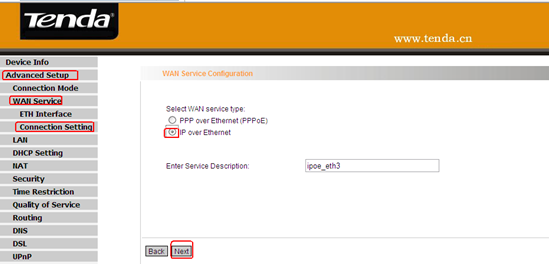
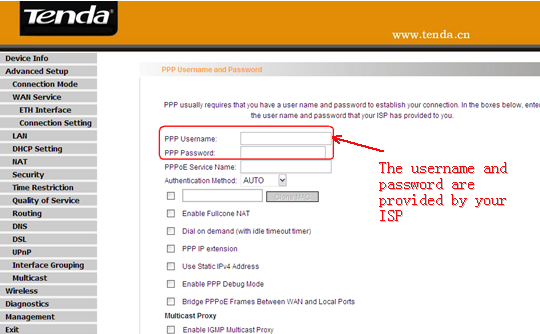
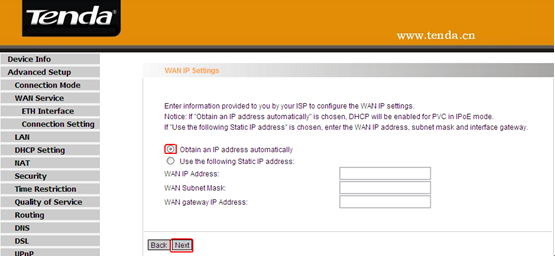
1. Make sure the parameters provided from your ISP are correctly input. Check the internet connection type.

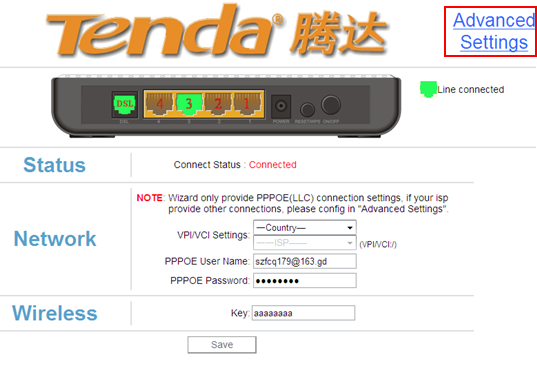
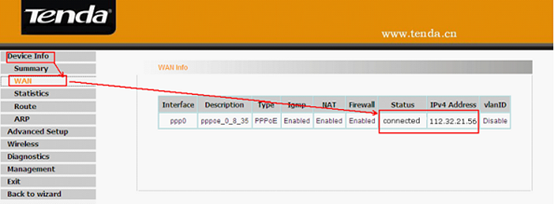
2. Refresh or reload this page three times to check the WAN Status, if it shows connected, please go to IV.

3. Go to Advanced Setup first, then click LAN and then change the IP address 192.168.1.1 to 192.168.10.1 and click on Apply,  W150D/W300D will be reboot.

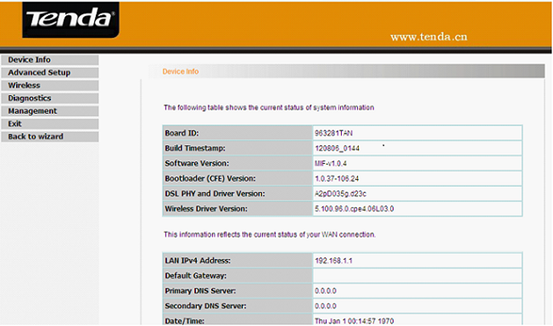
4. Type in 192.168.10.1 to the address bar and login to the home page again. Go back to Device Info > WAN and check the status and IP. If it still has no IP address, please power off your modem for a while, then turn the power back on and then redo step 2. If it has an IP address, you can access internet now.Please go to IV.

If the problem still exists, please contact us!

IV. Steps for wireless settings

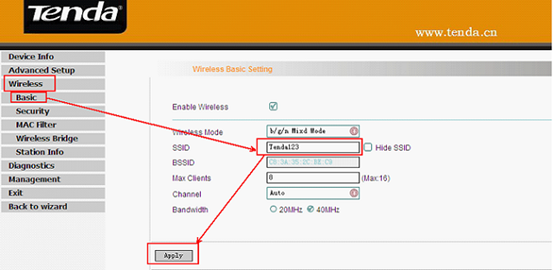
 1. Click on Wireless first then click Basic , please change SSID (it’s the name of your wifi) to another name, only numbers or letters can be included in, and select the channel to be channel 6 then click on Apply.

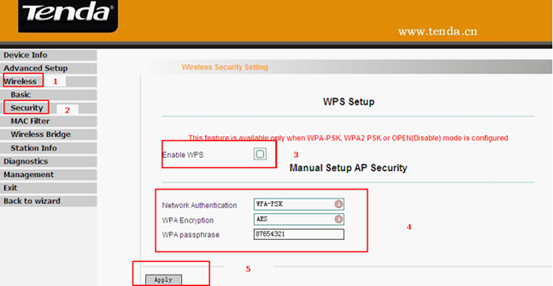
2. Click on Security under Wireless, please don’t check Enable WPS. Select Network Authentication to be WPA-PAK and select WPA Encryption to be AES. Set a password for your wireless network in the blank of WPA passphrase (at least 8 numbers or letters).Next, go to V.

 V. Connect to wireless network

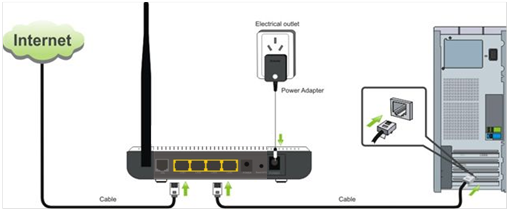
1. Unplug the cable between your computer and Tenda router.

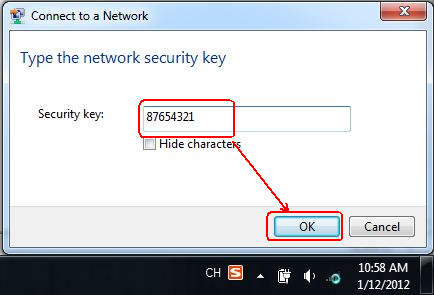
2. Find the name of your wireless network, the SSID you set it before.

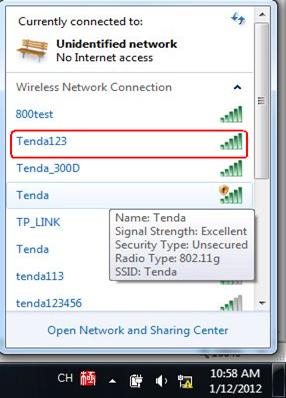
3. Type in the correct security key to connect. When it shows connected, you can use wifi now.


Download this article:


  • Категория документа : Internet Setup
  • Сопутствующие товары :

Была ли эта статья полезна?

Отлично!(13)Просмотры статьи(40984)